
Just a few months after your students return to campus, winter weather brings snow, ice, and slush.
Students and faculty track in this wintery mix along with ice melt and salt. The combination of moisture and salts create a slippery environment.
It also wreaks havoc on your school’s floors especially when not removed quickly.
When the combination of snow, ice, and salt dries, it often leaves behind a white residue or hazy appearance.
These residues are not only damaging to your floors but create a messy, dirty appearance.
When students and staff see your facility in this condition it makes them second guess the cleanliness of your campus. Parents also worry about the safety of their kids.
Residues must be removed to keep your students and faculty safe as well as your school floors protected and looking great during the winter months.
Protect Students From Slippery Floors in the Winter
Below, we’ll go over the 4 key steps to safely remove white streaks and residue from hard floors throughout your school.
Steps to Remove Ice Melt and Salt Residues From Your School’s Floors
Before beginning any cleaning procedure, start by putting on the proper personal protective equipment (PPE). Although we are listing the necessary steps below, please DON’T neglect the importance of a quality matting program. A good matting program will greatly aid in the safety and appearance of your facility.
Step 1: Remove Floor Mats
In most schools, an entry mat system is used as the first line of defense to protect floors against the winter weather.
While they can trap the majority of contaminants from the bottom of your students and faculty’s shoes, ice and water can still seep under matting and be tracked beyond your entry mat system.
To remove all residues, roll up the matting and remove it from the area.
We do not recommend trying to clean around floor mat systems. Water, floor neutralizer, and other wet residues can get trapped under matting during the cleaning process which can damage floors and lead to other floor problems like mold and mildew.
If your mats have become wet or stained with salts and moisture, use a carpet extractor with a floor neutralizer to clean them.
Step 2: Remove Debris
After removing any floor mats from the area to be cleaned, make sure there are no large objects or fixtures in the area.
Then, use a broom to sweep and remove large contaminants like solid rock salt remaining in the area.
Do not use a vacuum unless you are sure that there is no moisture on the floor.
If you are cleaning a large area, a wet-dry vacuum can be used to expedite the cleaning procedure. Wet/dry vacs are designed to remove liquids, unlike commercial vacuums which are not designed to be used to suck up liquid.
Step 3: Select a Floor Neutralizer
This is the most important step in removing white streaks and residues from your floors.
To clean and remove salt residues and white streaks, use a floor neutralizer.
Floor neutralizers are specifically designed to dissolve ice melt, salts, and other residues.
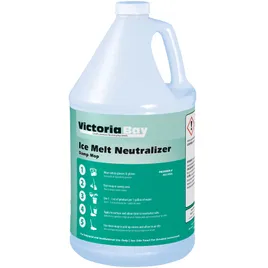
Floor neutralizer, like Victoria Bay Floor Neutralizer, will both clean the floor and eliminate white residue so you only have to perform one floor care procedure.
Floor neutralizer is not the same as a neutral floor cleaner. Neutral floor cleaner and other commercial cleaning chemicals will not be effective in cleaning and removing residues from your floors during the winter.
Most ice melt compounds contain salts, which have a high pH. They will not be easily removed with high or low pH chemicals.
Using a neutral floor cleaner will take more time, labor and produce mediocre results.
Additionally, neutral floor cleaners have the potential to react with salts and your floor finishes creating dangerous fumes. They can also be damaging to your floor.
Step 4: Apply Floor Neutralizer
Now that the floor is clear and you have selected the right floor cleaning product, prepare the floor neutralizer according to the manufacturer’s directions. In most cases the floor neutralizer does not require additional steps or increased labor. The neutralizer will effectively clean the floor and eliminate the residue left behind with typical neutral cleaners.
Place wet floor signs outside the area and begin to apply the floor neutralizer.
There are two methods to apply a floor neutralizer:
- Mop and Bucket Method
- Auto Scrubber Method
Mop and Bucket Method
For smaller or detail areas the mop and bucket method can be used to apply floor neutralizer. We don’t recommend this for larger areas like long hallways because it is a manual procedure that requires several steps.
To begin, identify a manageable working space. This is typically 10ft by 10ft.
Use a mop to apply the floor neutralizer in the area.
Next, rinse the floor (if stated on the product label) with clean water (not all neutralizers need to be rinsed).
If you need to remove the floor neutralizer, you’ll need to replace the solution in the bucket with clean water and rinse the mop. It is important to exchange the dirty cleaning solution and thoroughly clean the mop to avoid re-depositing salt and ice melt residue back to the floor.
Finally, let the floor dry and inspect for any white streaks. If there are still white streaks remaining, repeat the process.
Auto scrubber Method
For enhanced productivity, an auto scrubber can be used in place of a mop and bucket.
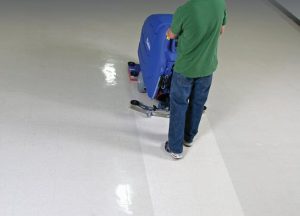
An auto floor scrubber applies, rinses, and dries the area in one step. This creates a safer, more efficient cleaning experience.
Auto scrubbers eliminate changeouts, the risk of cross-contamination from mops, and long dry times as well as the risk of occupant slips and falls.
Once the cleaning procedure is complete, clean and store the automatic floor scrubber properly. It is important to wash all metal components of the machine after using it near ice melt and/or salt.
Salts and ice melt are corrosive and can reduce the effective life of wear-and-tear parts such as the squeegee, tanks, and other metals on the machine. For this reason, it is important to be vigilant in emptying and cleaning any equipment when the process is completed.
Final Thoughts
The dangers that wet winter weather bring reinforces the importance of regular cleaning to keep your students and staff safe.
Removing ice melt and wet residues with a floor neutralizer is the best way to protect your school’s floors and your occupants.
While every school and university is different, we recommend cleaning your floors with a floor neutralizer as often as possible.
For high traffic buildings or dorms, this likely means removing ice melt residue with floor neutralizer once every one to two hours. This may be too frequent for low traffic areas. If you don’t see a buildup of residue, reduce the frequency of this cleaning procedure. On the other hand, if you still see build up you can increase the frequency.
Imperial Dade locations have a range of commercial floor cleaning products that can help your janitorial staff remove salt and ice melt residues from your school’s floors.
If you’re located in the United States, Puerto Rico, the Caribbean, or Cananda, contact a specialist today for help choosing the best products and equipment to maintain your floors during the winter.
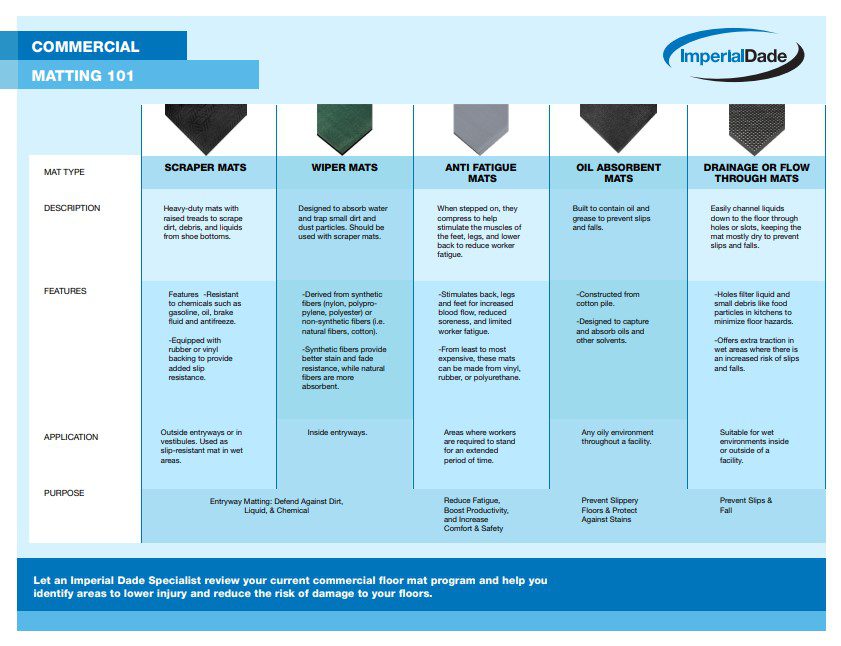
Everything you need to know about commercial floor mats including types, sizes, specs, & more!
Check Out These Related Articles:
- How to Keep Your School’s Floor Clean & Safe During the Winter
- Winter Floor Maintenance Tips: 4 Tips to Protect Your Facility’s Floors
- What is Ice Melt? Selecting The Best Ice Melt For Your Facility
- 4 Daily Procedures to Maintain Your Facility’s Resilient Hard Floors
- What is an Automatic Floor Scrubber? (Types, Sizes, & Features)